✅ Now Live: Advanced Order Store for All Business Types – Rentals, Services, Subscriptions & More!✅ Now Live: Advanced Order Store for All Business Types – Rentals, Services, Subscriptions & More!✅ Now Live: Advanced Order Store for All Business Types – Rentals, Services, Subscriptions & More!✅ Now Live: Advanced Order Store for All Business Types – Rentals, Services, Subscriptions & More!✅ Now Live: Advanced Order Store for All Business Types – Rentals, Services, Subscriptions & More!✅ Now Live: Advanced Order Store for All Business Types – Rentals, Services, Subscriptions & More!✅ Now Live: Advanced Order Store for All Business Types – Rentals, Services, Subscriptions & More!✅ Now Live: Advanced Order Store for All Business Types – Rentals, Services, Subscriptions & More!✅ Now Live: Advanced Order Store for All Business Types – Rentals, Services, Subscriptions & More!✅ Now Live: Advanced Order Store for All Business Types – Rentals, Services, Subscriptions & More!
CSS Grid Container
In this lesson, we will explore grid layouts, grid-template-columns, grid-template-rows, gap, as well as Grid Col Span and Grid Row Span classes. These fundamental elements are crucial for building the foundational structure of a grid-based layout, shaping the framework upon which our design is constructed
Grid Container
A Grid Container in CSS is an HTML element on which the display: grid or display: inline-grid property is applied. This element serves as the parent container for a collection of grid items. It's the starting point for defining a grid layout.
In CSS Grid, any HTML element can become a Grid Container. This includes <div>, <section>, <article>, <header>, <footer>, and even more semantic elements like <nav>. Essentially, any element that you can apply CSS to can be designated as a Grid Container.
1. Converting a Container Element into a Grid Container:
To convert an HTML element into a Grid Container, you need to apply the CSS property 'display' with the value 'grid' or 'inline-grid.' In Tailwind CSS, you can achieve this by specifying the 'grid' CSS class, as demonstrated below.
Code Snippet
<div className="grid"> ...</div>However, creating a grid layout involves more than just setting the display property. One crucial property you need to define is 'Grid Template Columns.' This property determines the number and size of columns in your grid, allowing you to create organized and responsive layouts.
2. Grid Template Columns
Grid Template Columns is a CSS property used to define the size and number of columns within a CSS Grid layout. It allows you to specify how the available space should be distributed among the columns.
In Tailwind CSS, there are various classes (e.g., grid-cols-1, grid-cols-2, grid-cols-3, etc.) that correspond to different values for the grid-template-columns property. Here's an explanation of the Tailwind CSS classes and their corresponding grid-template-columns property values:
- grid-cols-1: This class sets the grid-template-columns property to create a single column layout, taking up the entire available width.
- grid-cols-2: It creates a two-column layout, with each column having an equal share of the available space.
- grid-cols-3: Similar to the previous class, but it creates a three-column layout with equal width columns.
- grid-cols-4: Creates a four-column layout with equal width columns.
- grid-cols-5 to grid-cols-12: These classes generate grid layouts with 5 to 12 columns, all of which have equal widths.
- grid-cols-none: This class sets the grid-template-columns property to "none," effectively removing any column definitions. It's useful when you want items in the grid to determine their column sizes automatically.
- grid-cols-subgrid: This class sets the grid-template-columns property to "subgrid." Subgrid allows the grid container to inherit its column sizes from a parent grid container, making it useful for nested grids.
Lets look at some of the examples:
CSS grid with 2 Columns:
Code Snippet
<div className="grid grid-cols-2 gap-4 border border-gray-600 bg-stripes rounded"> <div className='p-4 bg-cyan-500 text-white text-center rounded-sm '>Grid Item 1</div> <div className='p-4 bg-cyan-500 text-white text-center rounded-sm'>Grid Item 2</div> </div>
CSS grid with 4 Columns:
Code Snippet
<div className="grid grid-cols-4 gap-4 border border-gray-600 bg-stripes rounded"> <div className='p-4 bg-cyan-500 text-white text-center rounded-sm '>Grid Item 1</div> <div className='p-4 bg-cyan-500 text-white text-center rounded-sm'>Grid Item 2</div> <div className='p-4 bg-cyan-500 text-white text-center rounded-sm '>Grid Item 3</div> <div className='p-4 bg-cyan-500 text-white text-center rounded-sm'>Grid Item 4</div> </div>
CSS grid with 2 Columns and 2 Rows:
Note the application of the 'grid-cols-2' class to the container. With 4 child items, 2 items will naturally move to the second row. This differs from flexbox behavior, where items stay in a single row unless 'flex-wrap' is employed.
Code Snippet
<div className="grid grid-cols-2 gap-4 border border-gray-600 bg-stripes rounded"> <div className='p-4 bg-cyan-500 text-white text-center rounded-sm '>Grid Item 1</div> <div className='p-4 bg-cyan-500 text-white text-center rounded-sm'>Grid Item 2</div> <div className='p-4 bg-cyan-500 text-white text-center rounded-sm '>Grid Item 3</div> <div className='p-4 bg-cyan-500 text-white text-center rounded-sm'>Grid Item 4</div> </div>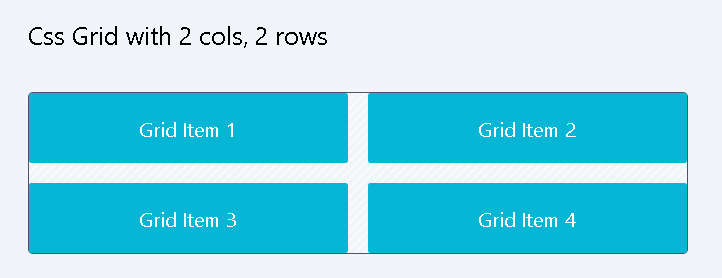
Note that the flow of grid items is from left to right, which is the default behavior of a grid. Since we have defined only two columns, the 3rd column automatically moves to the second row.
In the example above, we used the gap-4 class to create spacing between the grid items. This will be discussed in detail in the sections below.
3. Grid Template Rows
Grid Template Rows is a CSS property used in CSS Grid layouts to define the size and behavior of rows within a grid container. It allows you to specify the height of individual rows and distribute available space.
When using Grid Template Rows, it's important to consider the overall structure of your grid and how the rows will flow. The flow property (also known as the grid-auto-flow property) is important because it determines how items are placed into the grid when there are more items than there are rows defined. By default, it's set to row, which means items will be placed row by row, filling each row before moving to the next. However, you can change it to column if you want items to fill columns first.
Tailwind CSS provides a set of utility classes to easily define Grid Template Rows with different numbers of rows. Here's an explanation of the classes:
- grid-rows-1 to grid-rows-12: These classes define the number of rows in a grid. For example, grid-rows-1 sets one row, grid-rows-2 sets two rows, and so on, up to grid-rows-12 for twelve rows.
- grid-rows-none: This class sets the grid-template-rows property to "none," effectively removing any explicit row definitions. The grid will automatically size rows based on their content.
- grid-rows-subgrid: This class sets the grid-template-rows property to "subgrid," allowing the grid container to inherit its row sizes from a parent grid container. This is useful for nested grids.
Example with grid-rows-2:
Code Snippet
<div className="grid grid-rows-2 grid-flow-col gap-4 border border-gray-600 bg-stripes rounded"> <div className='p-4 bg-cyan-500 text-white text-center'>Grid Item 1</div> <div className='p-4 bg-cyan-500 text-white text-center'>Grid Item 2</div> <div className='p-4 bg-cyan-500 text-white text-center'>Grid Item 3</div> <div className='p-4 bg-cyan-500 text-white text-center'>Grid Item 4</div> <div className='p-4 bg-cyan-500 text-white text-center'>Grid Item 5</div> <div className='p-4 bg-cyan-500 text-white text-center'>Grid Item 6</div> </div>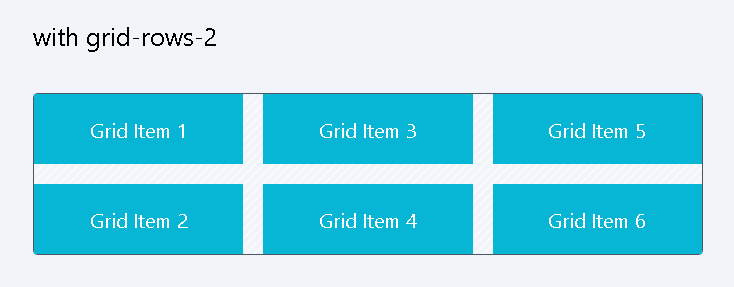
Note that the grid-flow-col class controls the flow of items within the grid columns. It essentially makes the grid items flow from top to bottom in a column-wise manner, which is different from the default behavior of a grid, where items flow from left to right.
4. gap
Tailwind CSS provides a comprehensive set of utilities for managing gaps in both Grid and Flex layouts. The gap properties work in the same way in grids as we have seen in flexbox containers. Let's break down the pattern of these classes:
gap-{size}:
- Purpose: Sets both the row and column gaps in a grid container.
- Usage: gap-{size}, where {size} represents the spacing size, ranging from Tailwind's default spacing scale (0, px, 0.5, 1, etc.).
Example:
gap-0: Sets both row and column gaps to 0px.
gap-px: Sets both row and column gaps to 1px.
gap-2: Sets both row and column gaps to 0.5rem (8px).
Code Snippet
<div className="grid grid-cols-2 gap-0 border border-gray-600 bg-stripes rounded"> <div className='p-4 bg-cyan-500 text-white text-center'>Grid Item 1</div> <div className='p-4 bg-purple-500 text-white text-center'>Grid Item 2</div> <div className='p-4 bg-orange-500 text-white text-center'>Grid Item 3</div> <div className='p-4 bg-green-500 text-white text-center'>Grid Item 4</div> </div>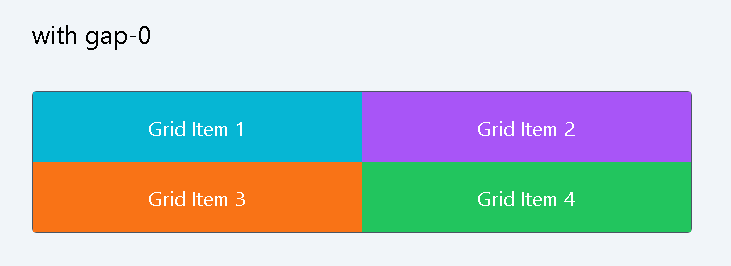
Code Snippet
<div className="grid grid-cols-2 gap-4 border border-gray-600 bg-stripes rounded"> <div className='p-4 bg-cyan-500 text-white text-center rounded-sm '>Grid Item 1</div> <div className='p-4 bg-cyan-500 text-white text-center rounded-sm'>Grid Item 2</div> <div className='p-4 bg-cyan-500 text-white text-center rounded-sm '>Grid Item 3</div> <div className='p-4 bg-cyan-500 text-white text-center rounded-sm'>Grid Item 4</div> </div>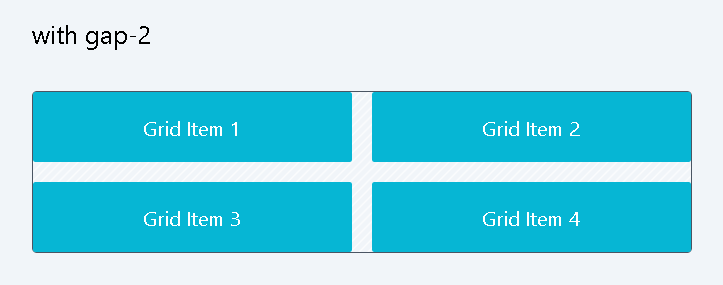
gap-x-{size}:
- Purpose: Specifically sets the horizontal gap between grid items.
- Usage: gap-x-{size}, where {size} follows Tailwind's spacing scale.
Example:
- gap-x-0: Sets column gap to 0px.
- gap-x-px: Sets column gap to 1px.
- gap-x-2: Sets column gap to 0.5rem (8px).
gap-y-{size}:
- Purpose: Specifically sets the vertical gap between grid items.
- Usage: gap-y-{size}, again based on Tailwind's default scale.
Example:
- gap-y-0: Sets row gap to 0px.
- gap-y-px: Sets row gap to 1px.
- gap-y-2: Sets row gap to 0.5rem (8px).
Code Snippet
<div className="grid grid-cols-2 gap-y-2 border border-gray-600 bg-stripes rounded"> <div className='p-4 bg-cyan-500 text-white text-center rounded-sm '>Grid Item 1</div> <div className='p-4 bg-cyan-500 text-white text-center rounded-sm'>Grid Item 2</div> <div className='p-4 bg-cyan-500 text-white text-center rounded-sm '>Grid Item 3</div> <div className='p-4 bg-cyan-500 text-white text-center rounded-sm'>Grid Item 4</div> </div>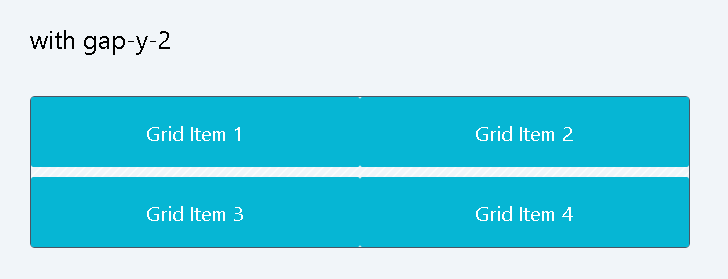
The {size} in these classes corresponds to spacing sizes defined in Tailwind's configuration. For example, 1 typically represents 0.25rem, 2 is 0.5rem, and so on, up to larger values for more significant gaps. These classes allow for precise control over the spacing between grid items, enabling responsive and visually appealing layouts.
5. Grid Col Span Classes
The "grid col span" classes in Tailwind CSS provide utilities for controlling how elements are sized and placed across grid columns. They help you define the span of columns that an element should occupy within a grid. Here's a detailed explanation of these classes:
Column Span Classes (col-span-{n}):
These classes determine how many columns an element should span within the grid.
- col-auto: The element's column span is set to "auto," allowing it to take up as much space as its content requires.
- col-span-1 to col-span-12: These classes set the element's column span to a specific number of columns, from 1 to 12. For example, col-span-2 makes the element span 2 columns horizontally.
- col-span-full: This class makes the element span the entire width of the grid container. It's equivalent to grid-column: 1 / -1, which spans from the first to the last column.
Example: In a grid with 3 columns, the first item has a col-span of 2, covering a width of 2 columns.
Code Snippet
<div className="grid gap-4 grid-cols-3 border border-gray-600 bg-stripes rounded"> <div className='p-4 col-span-2 bg-cyan-500 text-white text-center'>Grid Item 1</div> <div className='p-4 col-span-1 bg-cyan-500 text-white text-center'>Grid Item 2</div> </div>
Column Start Classes (col-start-{n}):
These classes determine the starting column for the element.
- col-start-1 to col-start-12: These classes set the starting column for the element within the grid. For example, col-start-2 places the element in the second column of the grid.
- col-start-13: This class is provided to extend beyond the usual 12-column grid setup. It sets the starting column to column 13.
- col-start-auto: This class sets the starting column to "auto," which allows the grid to determine the starting position based on the grid's own placement algorithm.
Example: In a grid with 3 columns, the col-start-3 class is applied to the second item, pushing it to column 3, and affecting subsequent items as well.
Code Snippet
<div className="grid gap-4 grid-cols-3 border border-gray-600 bg-stripes rounded"> <div className='p-4 bg-cyan-500 text-white text-center'>Grid Item 1</div> <div className='p-4 col-start-3 bg-purple-500 text-white text-center'>Grid Item 2</div> <div className='p-4 bg-cyan-500 text-white text-center'>Grid Item 3</div> </div>
Column End Classes (col-end-{n}):
These classes determine the ending column for the element.
- col-end-1 to col-end-12: These classes set the ending column for the element within the grid. For example, col-end-3 places the element's end in the third column of the grid.
- col-end-13: Similar to col-start-13, this class extends beyond the usual 12-column grid setup and sets the ending column to column 13.
- col-end-auto: This class sets the ending column to "auto," which allows the grid to determine the ending position based on the grid's own placement algorithm.
Example: In a grid with 5 columns, the col-start-3 and col-end-5 classes are applied to the second item. This configuration causes the second item to start at column 3 and end at the beginning of column 5.
Code Snippet
<div className="grid gap-4 grid-cols-5 border border-gray-600 bg-stripes rounded"> <div className='p-4 bg-cyan-500 text-white text-center'>Grid Item 1</div> <div className='p-4 col-start-3 col-end-5 bg-purple-500 text-white text-center'>Grid Item 2</div> <div className='p-4 bg-cyan-500 text-white text-center'>Grid Item 3</div> <div className='p-4 bg-cyan-500 text-white text-center'>Grid Item 4</div> </div>These classes provide precise control over how elements are placed and sized within a grid, making it easier to create complex and responsive layouts using Tailwind CSS.
6. Grid Row Span Classes
Similar to the Grid Column Span classes, Tailwind CSS provides Grid Row Span classes to control the height and placement of elements within a grid's rows. These classes allow you to specify how many rows an element should span, its starting row, and its ending row. Here's an explanation of these classes:
Row Span Classes (row-span-{n}):
These classes determine how many rows an element should span within the grid.
- row-auto: The element's row span is set to "auto," allowing it to take up as much space as its content requires vertically.
- row-span-1 to row-span-12: These classes set the element's row span to a specific number of rows, from 1 to 12. For example, row-span-2 makes the element span 2 rows vertically.
- row-span-full: This class makes the element span the entire height of the grid container. It's equivalent to grid-row: 1 / -1, which spans from the first to the last row.
Example: In a grid with 2 columns, applying row-span-2 to item 2 makes it cover the space of two rows, thereby pushing item 4 to the third row.
Code Snippet
<div className="grid gap-4 grid-cols-2 border border-gray-600 bg-stripes rounded"> <div className='p-4 col-span-1 bg-cyan-500 text-white text-center'>Grid Item 1</div> <div className='p-4 col-span-1 row-span-2 bg-purple-500 text-white text-center'>Grid Item 2</div> <div className='p-4 col-span-1 bg-cyan-500 text-white text-center'>Grid Item 3</div> <div className='p-4 col-span-1 bg-cyan-500 text-white text-center'>Grid Item 4</div> </div>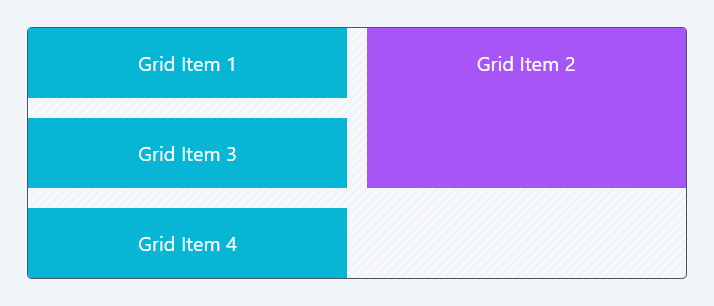
Row Start Classes (row-start-{n}):
These classes determine the starting row for the element.
- row-start-1 to row-start-12: These classes set the starting row for the element within the grid. For example, row-start-2 places the element in the second row of the grid.
- row-start-13: This class is provided to extend beyond the usual 12-row grid setup. It sets the starting row to row 13.
- row-start-auto: This class sets the starting row to "auto," allowing the grid to determine the starting position based on the grid's own placement algorithm vertically.
Example: Grid having 4 cols; the row-start-2 is set for the second item, making it start from row 2

Row End Classes (row-end-{n}):
These classes determine the ending row for the element.
- row-end-1 to row-end-12: These classes set the ending row for the element within the grid. For example, row-end-3 places the element's end in the third row of the grid.
- row-end-13: Similar to row-start-13, this class extends beyond the usual 12-row grid setup and sets the ending row to row 13.
- row-end-auto: This class sets the ending row to "auto," allowing the grid to determine the ending position based on the grid's own placement algorithm vertically.
In this lesson, we've delved into grid layouts, grid-template-columns, grid-template-rows, gap, Grid Col Span, and Grid Row Span classes, all of which play a pivotal role in establishing the underlying structure of a grid-based layout. These foundational concepts help create the grid framework that forms the basis of our design.
In our next lesson, we'll take a closer look at the intricate art of aligning and positioning items within this grid structure. We'll explore various techniques and CSS properties that allow us to fine-tune the placement and alignment of grid items, ensuring that our layouts are both visually appealing and responsive to different screen sizes.
In this lesson, we will delve into the diverse methods of aligning grid items within a CSS Grid layout. We will investigate how to employ CSS classes such as justify-items, align-items, align-content, justify-self, and align-self to precisely manage the placement of grid items, whether at the container level or on an individual basis within grid cells.
All Modules